Saturday, August 31, 2013

First Halloween Card


Hello my crafty friends,
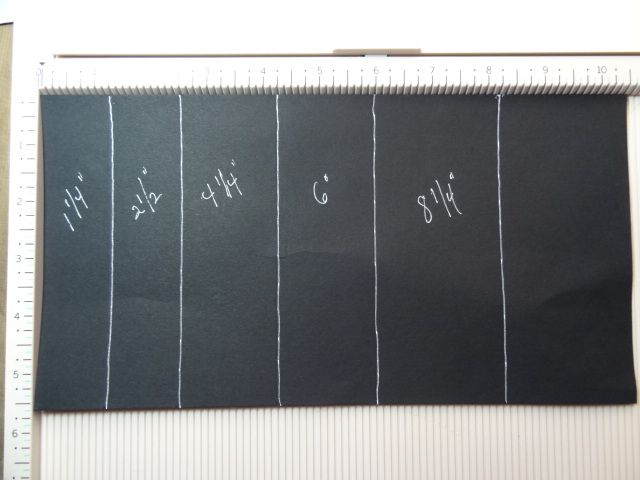
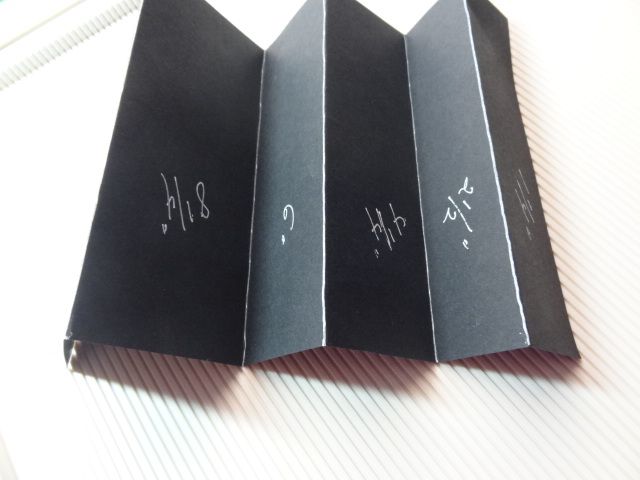
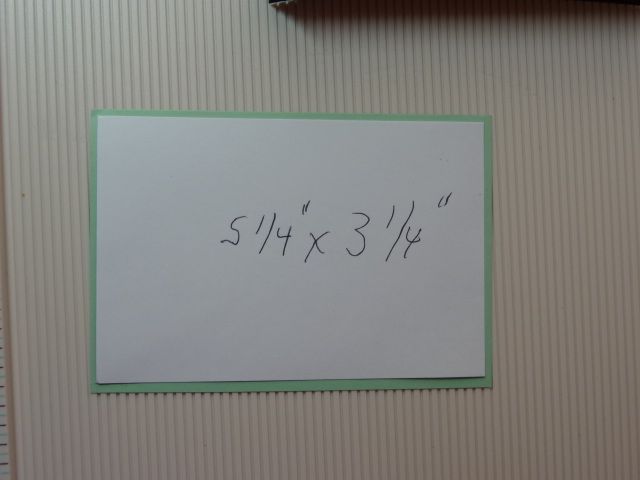
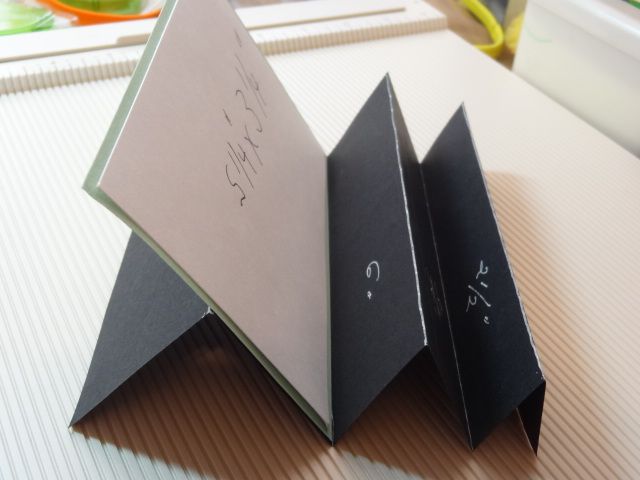
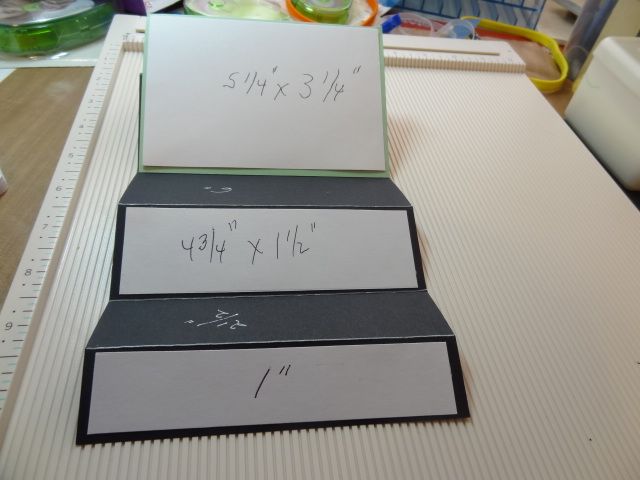
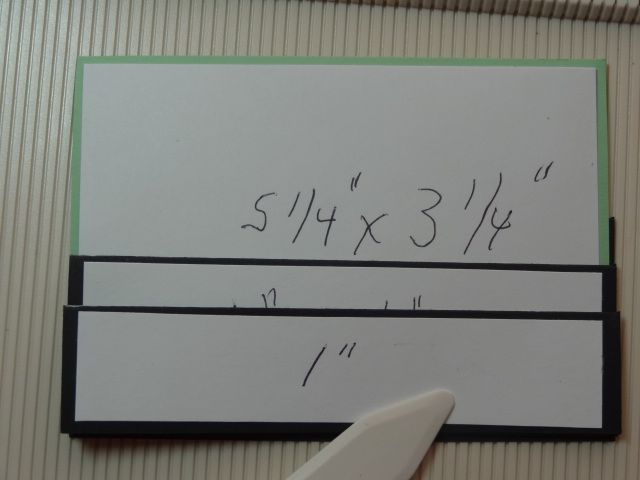
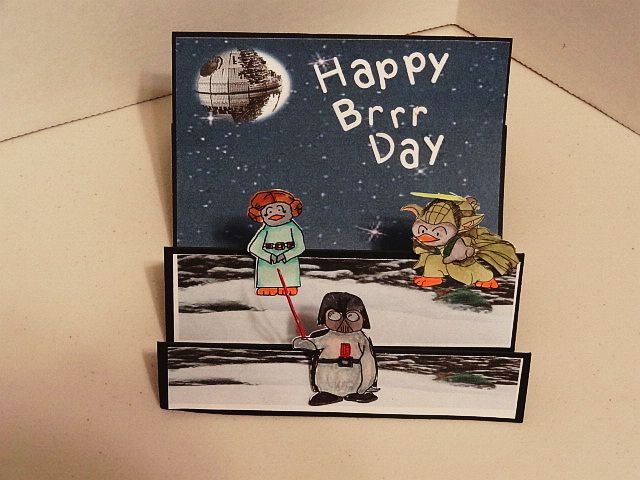
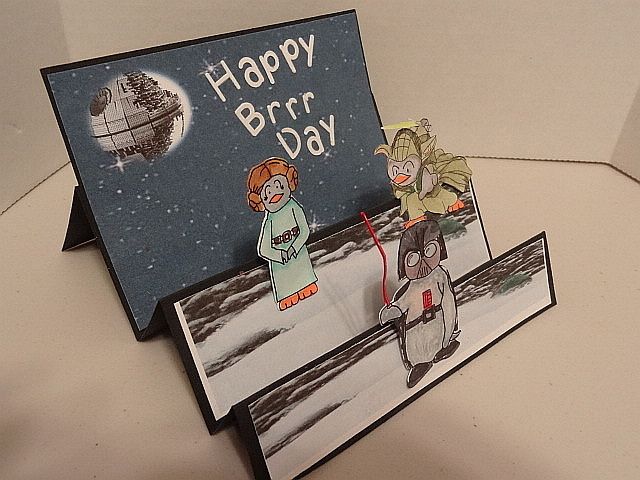
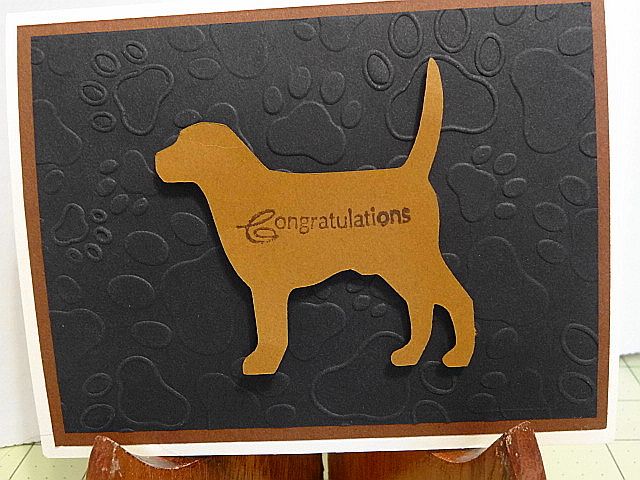
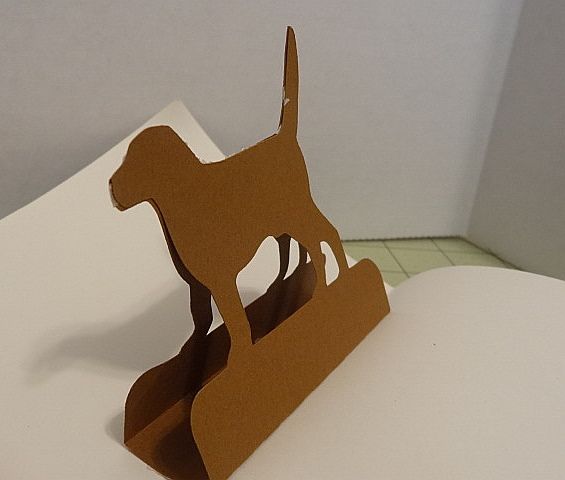
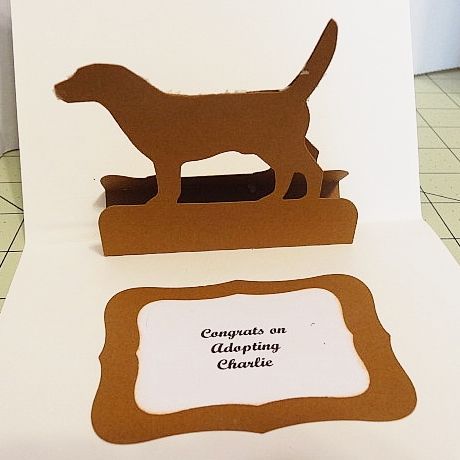
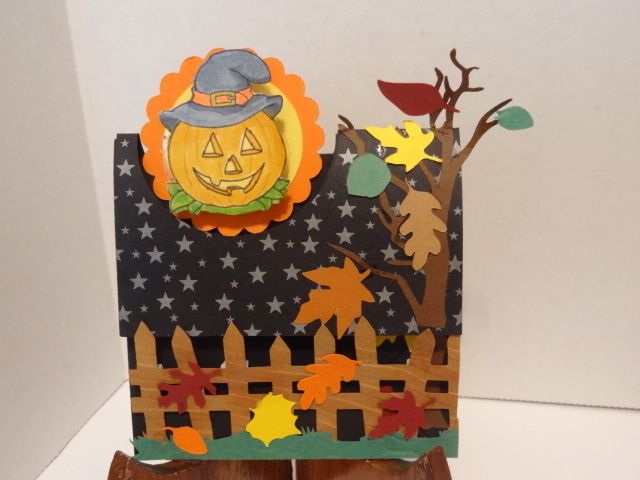
I am finding myself more out of my comfort zone with creating my cards since I created my first step card. Here.   This is a 3 fold card.  With Halloween coming up I chose a free pumpkin image . Have I told you I love my Silhouette Cameo and Spectrum Noir markers? LOL I cut the image, leaves and fence with the Silhouette.  I used the Cuttlebug woods embossing folder for the fence to give it texture and the fence also works to keep the card closed. The card was made with MTC. The tree was a free digital image and also cut with the Silhouette. I cut the tree so you could still see the trunk on the front and when you open the flap.  I added another treetop so it stays consistent with the front of the card. As with the design of the card you see the pumpkin is still visible when you open it.  I also mounted the pumpkin on an action wobble.  It looks cool when it wobbles. LOL The Spectrum Noir markers I used  BG3,4 CT2,3,GB2,3,4,5,11,LG1,2,FL2
      
Thanks for stopping by today. I enjoy hearing from you.
I'm entering this card in the following challenges:
Hiding in my Craft room: http://www.hidinginmycraftroom.com/
Threw the Craft Room Door: http://www.craftdoormagazine.com/
Totally Gorjuss Challenge: http://totallygorjuss.blogspot.se/
Frilly and  Funkie:  http://frillyandfunkie.blogspot.com/


Thursday, August 29, 2013

The Card She Never Made Before. How Did She Do It?

Hello fellow crafters.
Here it is as promised. The card I never made before. I know the reason why. I like to eyeball measure things rather than deal with fractions. LOL.  This is my first step card. But I'm learning how to use my Martha Stewart Score Board. Okay, here are the measurements for those who care to try this. The card base is 5"x10.50" Score along the long side. 1.25",2.25",4.25",6", and 8.25" . Start by  Mountain folding the 8.25" score lines and accordion fold from there.
 
Below you can see here how these look like steps.  I needed a higher background canvas for my card since I was working with smaller pieces and I wanted the background to be a vocal point.  I used color paper here to show more clearly how it was layered on the rear mountain fold. It was cut at 5.5 x 3.5 inches.  I then cut a layer size for it 5.25 x 3.25 inches.
  Here you can see how it is layered on the back mountain fold. Next I cut strips for the front panels.  I wanted to have a boarder around the strips. The front strip was cut at 4.75" x 1 inch.  The second was cut at 4.75" x 1.5"
This will fit in an A2 envelope when folded. Here it is folded closed and open to display I like that you can see the cascading shadows behind the characters.
 
Follow me on my creative journey as I share what I learn along the way. Thanks for your comments I love hearing from you.
 
Challenges entered:


Tuesday, August 27, 2013

Unvailing The Card I Never Made Before.

Hello My Crafty Followers.
Here is the card you have been waiting to see from me. LOL  The card I never made before.
 
Yes, it is a Step Card.  I will post how it made this with measurements soon.  I like how you can see the shadows from the characters. This is for the {Pin}spirational Challenge #72. Be sure to stop by and see what my talented design sisters have made.  The images are from Scribbles Designs I used my Silhouette Cameo to print and cut the images.  This was the first time I really used the Silhouette for a project.  My husband bought the Silhouette for me for Mother's day. After watching what seemed like watching hundreds of YouTube video's it was time to put what I learned to work. By no means am I an expert at it and I have a lot more to learn.  But compared to the $$$ I spent on cartridges the Silhouette Cameo gives me more freedom to use the free SVG and clip art online.
Since I had to keep this under wraps until the challenge was posted. I made a birthday card for my son's birthday here.. . This card will fit in an A2 envelope when folded.
here it is flat for an A2 envelope and     here is the side view. 
 
I found free clip art online for the background. I have a laptop with Windows7 and I was able to use the Word Program to merge the clip art together for the background paper. The snowy layers w
ere also free clip art on line. I thought this went perfect with this card theme. Brrr....  Of course I used my Spectrum Noir Markers to color the images. The lettering are die plates from Cuttlebug. I bought these years ago.  I wasn't sure what the sentiment was going to be.  The inspiration theme is Brrr Wars. LOL.  So Happy Brrr Day can be for a winter birthday or  the first day for a winter greeting. I will post how I made this shortly. Thanks for stopping by and leaving comments. I love hearing from you. Stay tuned for How did she do that.
I entered this card in the following challenges:
Creative Craft Challenge:  http://creativecraftchallenges2.blogspot.com/


Wednesday, August 21, 2013

PopUp Beagle Card

Hello my crafty friends,
Today I made a Beagle Pop Up card for my son and his family.  They rescue/adopted a 3 year old beagle a couple of days ago.  They named him Charlie.  No not Charlie Brown. LOL.  The base card is 4.25x5.50 I layered it with brown paper 4.0x5.75 and then used a Darice Paws embossing folder for the black mat 3.75x5.25.  I had originally used the brown paper but it didn't look good if you get my drift. LOL.  I created the beagle cut file in MTC.  I used Spellbinders label dies for the mat inside and Tim Holts Tea Die distress in for the edges. The sentiment was computer generated and printed,  I believe the Congratulation stamp sentiment is from a Hero Arts clear stamp set. I didn't keep the package  and I wasn't very organized way back when I started this hobby many years ago. LOL. I also mounted the beagle on foam tape.  I liked the way this card turned out. When you open it you can see the shadow of the beagle on the back of the card.  I'm proud of my son for rescuing and giving Charlie a second chance for a better life.  As some of you may know from a previous post here.  I'm a volunteer for Florida.Boxer.Rescue.  Please adopt/foster an older pet. So many people dump their pets at the pound or worse in the streets because they are old.  But they have plenty of love to give you if given the chance. Adopt/Foster an older Pet and Save A Life and make an old dog's last years the best he and you could ever share together. Thanks for stopping by today.  Let me know you stopped by so I can come visit you too. I love reading your comments.

 I entered this card in the following challenges:
Through the Craftroom Door: http://www.craftdoormagazine.com/
The Crazy Challenge:  http://crazychallenge.blogspot.com/


Friday, August 16, 2013

Super project. I took the plunge and bought the Silhouette Cameo. Love it.

Hello my crafty friends.
DH had bought me the Silhouette Cameo for mother's day. After watching what seemed like hundreds of YouTube video's I took the plunge into using it for my first real project.  Unfortunately, I can't show it to you yet as it is for the {Pin}spirational Challenge August 27. I promise it is something I've never created before. And I surprised myself how easy it was. Follow me if you would like to see what new adventures in crafting are coming to Kitt's World. 

Now onto my next awesome Silhouette project. I love the way it came out.  My son has been a fan of Superman since he was a little boy.  His birthday is coming up and I thought I'd make him a card with Superman.  I found a free coloring book image online of Superman.  I have Windows 7 and I used Word to import the picture of Superman and a headshot of my son.  I used the Paint program to edit a photo of my son to get the head shot. Using the text Send to Back and Bring to Front feature in Word I was able to merge my son's head onto Superman.
  
I then printed it out and used Spectrum Noir Markers to color the image. I found free background paper online at Scrapbook Flair. It was perfect for my design.  I didn't like that it had so much white on the image so I sponged it with memento sky blue ink.  I still wasn't inspired by it. Then as if a light bulb went on, I decided it was time for me to step up to the plate and use the Silhouette. After all, it worked out so well for my {Pin}spirational project. Post coming August 27th.   {tease, hee,hee}.
This is the print out.                   This is how it cut out.
I am so please with the way the Silhouette cut around the cape and the knuckles.  I'm amazed how this machine works. I put my Super Son on an action wobble.  I used memento red ink to edge around the label which was done with a Spellbinders long rectangle scallop nesting die set.  I added red buttons and the red base card is 4.25 x 5.50 and the mat is 4 x 5.25
 
I use my Scrapbook Max 2 program as a workspace to see how my layouts would look and what background papers would match.
 And now for my finished project here it is:
 On an action wobble          Inside view I used white cardstock and trim from front mat.
 
Thanks for leaving comments I love hearing from you. Follow Kitt's World to see what creative adventures we can learn and share together.
I entered this card in the following challenges:
Papertake Weekly Challenge: http://papertakeweekly.blogspot.com/
Through the Craft Door: http://www.craftdoormagazine.com/


Monday, August 12, 2013

Play Ball

Hello my crafty friends
For {Pin}spirational Challenge #70 the image I have today is from  Bugaboostamps .  The uniform is my granddaughter's school colors. She is into all kinds of sports.  As you can see I'm getting out of my comfort zone with layering.  The paper is from Stampin Up. I used the Chevron embossing folder for the mat.  I used Spectrum Noir markers and I'm venturing out to new skin and  hair color shades. Uniform: DR5 GB11, HAIR: TN7,9, SKIN: FS2,4,9, BUBBLE GUM: PP1,2, GRASS: LG5,CG4. Follow me as I discover new ways to combine Spectrum Noir markers colors and more out of my comfort zone projects coming soon.  Thanks for your comments. I love hearing from you.
I entered this card in the following challenges:
Word Art Wednesday: http://www.wordartwednesday.blogspot.com/
Lady Anne's Challenges: http://www.ladyanneschallenges.com/index.html
Kraftyhands Challenge: http://kraftyhandschallenge.blogspot.co.uk/
Sister Act: http://sisteractcardchallenge.blogspot.de/
Challenge4Everybody: http://challenges4everybody.blogspot.co.uk/
Through the Craft Door: http://www.craftdoormagazine.com/
Crafty Calendar: http://craftycalendarchallenge.blogspot.se/
5 Simple Things: http://asimplefive.blogspot.se/
Scrap Creations: http://scrap-creations1.blogspot.se/

Monday, August 5, 2013

Comparison photos as promised.

Hello fellow crafters,
As promised here is the comparison photo of the image from Squigglefly where  my previous post  said I miss my Spectrum Noir Markers. This is also for the {Pin}spirational Challenge #69  I was out of town and didn't have them with me. I had to make due with crayons, color pencils and my son's printer.   Now that I'm back home I was able to redo the image with my Spectrum Noir Markers.  It printed a bit smaller than the original which made the coloring a little more difficult. But you can see the difference in the brilliance of the color between the pencils and the markers.   I also added some memento sky blue ink on both of them to give it a bit more color than the stark white background. I didn't have that available at the time I made the original. Thanks for leaving comments I love hearing from you.
Entered in the following Challenges:
Spectrum Noir Challenges: http://www.spectrumnoir.com/challenge/
Through the Craft Room Door: http://www.craftdoormagazine.com/